
Kitchen Island Power Integration: The Complete Guide to Pop-Up Outlets and Smart Placement
The kitchen island has evolved from a simple food preparation surface to the central hub of the modern home. It’s where cooking, dining, working, and socializing converge—making accessible, well-designed power not just a convenience but a necessity. For furniture manufacturers and kitchen designers, offering intelligent power solutions can significantly enhance product value and customer satisfaction.
This guide covers both the best power integration solutions available and the strategic placement principles that make them work.
5 Innovative Power Solutions for Kitchen Islands
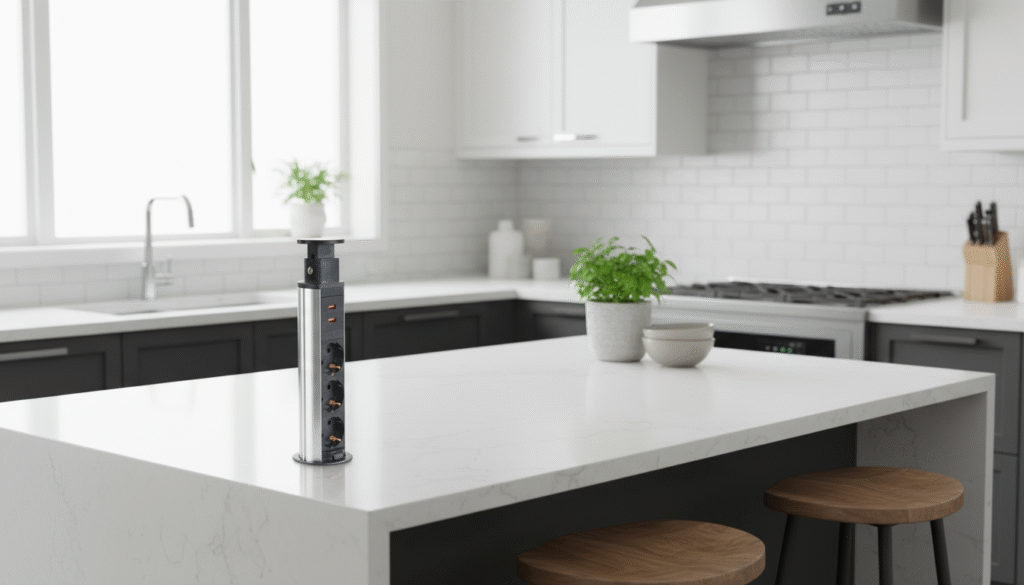
1. Central Pop-Up Power Module
The most popular solution for modern islands. Pop-up sockets offer seamless functionality that disappears completely when not in use.
Key Features:
- Smooth electric or pneumatic activation brings power to the surface exactly when needed
- Multi-interface integration: AC outlets, USB-C charging (up to 100W), and wireless charging pads
- Customizable finishes to match countertop material and color
- IP54 water-resistant design protects against spills and moisture
Best For: Islands used for food preparation, casual dining, and device charging where clean aesthetics are paramount.
Placement Tip: Position at least 30cm from the edge to prevent accidental activation, and ensure adequate clearance for connected cables.
2. Perimeter-Mounted Power Track System
Power track sockets install along the island’s sides or ends, providing movable outlets that can be repositioned anywhere along the rail.
Key Features:
- Modular design: multiple outlets positioned anywhere along the track
- Expandable capacity as needs evolve
- Dual-level positioning for both counter height and lower-level devices
- Option to combine power access with integrated task lighting in a single system
Best For: Large islands used for entertaining, baking, or flexible workspaces where multiple appliances are used simultaneously.
Placement Tip: Install on the side opposite to main traffic flow, with a finish that complements the island’s overall design.
3. Pull Pop-Up Mechanism
Combining the discreet nature of pop-up sockets with extended reach, pull pop-up sockets offer unparalleled versatility.
Key Features:
- Two-stage activation: first pops up, then pulls outward for optimal positioning
- Rotational capability on some models (up to 360°) for maximum accessibility
- Built-in cable management channels keep cables organized during use
- High-capacity charging supporting multiple fast-charging protocols
Best For: Islands serving as homework stations or tech hubs where devices need flexible positioning and frequent connection.
4. Sliding Cover Socket
For minimalist designs where even a pop-up mechanism might be visually intrusive, sliding cover sockets provide an elegant low-profile alternative.
Key Features:
- Sits nearly flush with the countertop surface
- Silent sliding operation
- Excellent dust and moisture sealing when closed
- Custom panel options to match exact countertop materials
Best For: High-end, minimalist kitchens where maintaining visual flow is as important as functionality.
5. Distributed Zone-Based Power Strategy
Instead of a single power source, this approach integrates multiple specialized outlets throughout the island, each serving a distinct function:
- Appliance Zone: Dedicated high-power outlets for mixers, blenders, and cooking tools
- Entertainment Zone: USB and data ports for devices and streaming
- Dining Zone: Lower-profile outlets for charging phones and tablets during meals
- Work Zone: Enhanced connectivity for laptops and office equipment
Best For: Large, multifunctional islands that serve distinct purposes simultaneously, accommodating different user needs in different areas.
Strategic Placement Guide: Where to Put Your Outlets
Understanding the functional zones of your island before specifying outlet positions is critical. Most modern kitchen islands have up to five zones:
- Preparation Zone: Primary food prep area with small appliances
- Dining/Social Zone: Where people gather for meals and conversation
- Work/Study Zone: Increasingly used for homework and remote work
- Entertainment Zone: For hosting and social gatherings
- Storage Zone: Often overlooked for charging stored devices
Placement Option A: Central Module
Position a pop-up socket in the island’s center for optimal accessibility across multiple users.
- Ideal for larger islands (1.8 meters or longer)
- Suits families using the island for simultaneous activities
- Best in open-concept kitchens where the island serves multiple functions
Placement Option B: Dual Corner
Installing outlets at opposite corners accommodates multiple users while maintaining clear sight lines.
- Ideal for entertaining-focused households
- Works well for islands that serve as buffet stations
- Position 15–20cm from each corner; choose low-profile models that won’t interfere with seating
Placement Option C: Side-Mounted Track
A power track along one side provides ultimate flexibility with movable outlets.
- Ideal for serious cooks using multiple appliances simultaneously
- Perfect for islands that change function throughout the day
- Install on the side opposite to main traffic flow
Placement Option D: End Panel Integration
Mounting outlets on the island’s end panels keeps them accessible yet completely unobtrusive.
- Best for smaller islands where surface space is limited
- Creates a dedicated charging station away from food prep areas
- Position at convenient height (90–107cm from floor); use pull pop-up sockets for enhanced flexibility
Application-Specific Configuration Recommendations
For the Entertaining-Focused Island:
- Central pop-up socket with 4 AC outlets and 2 USB-C ports
- Two corner-mounted outlets for guest device charging
- Integrated wireless charging and optional Bluetooth connectivity
For the Family-Centric Island:
- Dedicated power track with movable outlets for a homework zone
- Discreet sliding cover socket for parent phone/laptop charging
- High-capacity outlet in the appliance corner for mixers and blenders
For the Compact Urban Island:
- Single pull pop-up socket with comprehensive interface selection
- Side-mounted installation to preserve counter space
- Smart home integration capability for voice control
Technical Requirements for Kitchen Island Outlets
Safety (Non-Negotiable)
- GFCI Protection: Essential for all kitchen outlets near water sources
- Circuit Capacity: Dedicate at least one 20-amp circuit to the island
- Water Resistance: IP54 rating minimum for splash protection
- Child Safety: Outlets with safety shutters for family homes
- Certifications: CE, UL, or relevant regional safety standards
Functional Specifications
- USB-C Power Delivery: Minimum 30W, ideally 65W+ for laptop charging
- Wireless Charging: Integrated Qi charging for phones and compatible devices
- Voltage Options: Consider 220V/240V outlets for high-power European appliances
Aesthetic Integration
- Finish Matching: Coordinate with cabinet hardware and faucet finishes
- Profile Height: Choose low-profile models (under 5cm) where possible
- Material Quality: Anodized aluminum alloy withstands kitchen environments long-term
Implementation Best Practices
Planning Phase:
- Involve both the kitchen designer and electrician early in the process
- Map the island’s primary functions and typical user workflows
- Plan conduit routes and access points for future maintenance
- Future-proof by including spare capacity for smart home integration
Installation:
- Ensure adequate box depth for the chosen mechanism
- Provide sufficient cable length for full extension and movement
- Test mechanism operation before finalizing countertop installation
User Experience:
- Choose activation methods that suit the household (manual, pneumatic, or electric)
- Ensure comfortable access without excessive reaching or bending
- Consider sight lines from the main kitchen and living areas
For material selection guidance for moisture-prone kitchen environments, see our aluminum vs zinc alloy guide.
Why Moonian for Kitchen Island Projects
Moonian’s kitchen-specific socket range is designed for the demands of food preparation environments:
- Water-Resistant Models: IP54 rated with dampened closing mechanisms and easy-clean surfaces
- Custom OEM/ODM: Finish matching, custom interface configurations, and branding for furniture manufacturers
- Technical Support: CAD/BIM files and engineering consultation for seamless integration
- Quality Materials: Aviation-grade aluminum, zinc alloy, and premium plastics built for long-term use
Explore Our Kitchen Island Solutions: → Pop-Up Sockets for Kitchen Islands → Power Track Systems → Pull Pop-Up Mechanisms → Sliding Cover Options → Contact Our Design Team